How to reclaim and restore your heritage timber floors?
If you are lucky enough to have one, bring that heritage floor back to life and keep that antique character of your floor. This can be done in a few ways, depending on the state of your existing floor. It may have historical character that you don’t want to lose. For example in an old convent, the floor boards were marked by the beds from where the nuns had prayed over the years. An aggressive sanding would lose this history.
If this is the type of situation, often a thorough cleaning with our Whittle Waxes Preparation Cleaner followed by buffing on extremely thin coats of Evolution Hardwax Oil or Whittle Waxes Bio Wax can offer everything you need to preserve your floor.
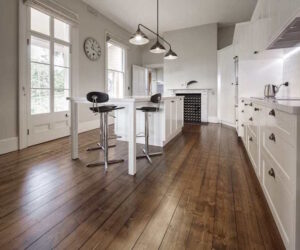
If you desire your existing floor to look like a new floor as in the photo provide here by Timberoo Flooring Specialist then renovating a timber floor is well worth your investment, especially when refinishing with Evolution Hardwax Oil. Once this large renovation project is done, there is no need for aggressive sanding again, as hardwax oils can be replenished with a simple recoat. This means no loss of timber which can be approximately 4mm with every aggressive sand. Therefore allowing your floor to build back that antique character.
Timber Preparation:
- Carefully remove and nails or staples from the timber. They can be hard to detect at times, go over the timber several times with a nail finder metal detector to be sure not to miss any. The time used doing this will save you money in ripped sandpaper.
- Working in the direction of the floor boards working as close to the edges as possible, start with the coarsest grain of sandpaper on a power sander, and continue this process with finer and finer grades of sandpaper until you reach about a 120 grit and the surface is uniform. Make sure that the edges are as properly sanded as the rest of the floor, this can be achieved with a hand sander.
*If the floor has been previously coated with polyurethane, insure you have a proper mask for the sanding dust. Vacuum the surface thoroughly especially between the cracks of the floor boards.
Wood Filler
Redifill Wood Filler: Make sure the surface is clean and free of dust. Fill all holes with a colour that best represents the colour of the wood once it is to be coated. (This latter point is very important). Then apply REDIfill with your thumb, spatula or steel trowel leaving a layer over the hole or small gaps. Allow 15-45 minutes to dry before sanding with a medium to fine sandpaper, clean all tools with water.
Product preparation Evolution Hardwax Oil
- It has different effects on different surfaces. Trial application required.
- Stir well before and during use.
- Please mix enough product to complete the area, when using more than one container.
Application of Evolution Hardwax Oil
- Apply the first coat with brush, roller or paint pad thinly and evenly, aim to achieve 30sqm per Litre
- Ideally leave overnight.
- An intermediate sand with a 220 grit screen will improve the look and feel of the finish. Apply second coat aiming to achieve 30sqm/L
- Drying time depends on temperature, humidity, timber species and surface texture.
Curing period
Allow the Hardwax Oil to fully cure for about 10 days before getting it wet, you can carefully walk on it with socks during this time. Set your furniture in place instead of sliding or scuffing it across the floor. Do not clean the floor other than with a light sweeping for at least a week, and thereafter clean with Whittle Waxes Floor Care concentrate to maintain and prolong the life of the hardwax oil finish.
Things You Will Need
Evolution Hardwax Oil Matte, Classic, Satin or Gloss
Power floor sander
Hand-held sander
Nail finder metal detector
Sandpaper
Wood filler
Vacuum cleaner
Paintbrushes
Rags